WordPress plugin instructions
To use your 3D mapper plugin you need to follow these simple steps:
- Install the plugin in your WordPress
- Get Access Token to connect the plugin with your 3d-mapper.com account
- Create and purchase 3D maps (see detailed video description)
- Import your 3D maps
- Add your 3D maps to your content
Let’s get started!
1. Install the plugin
Once you’ve downloaded the installation file (login 3d-mapper account > Dashboard > Addons > Download the WordPress plugin), extract it and locate a file called 3d-mapper.zip. You can install the plugin by using one of two installation methods:
WordPress upload
This is probably the simplest way for most users. Here are the steps you need to take:
- Login to WordPress admin
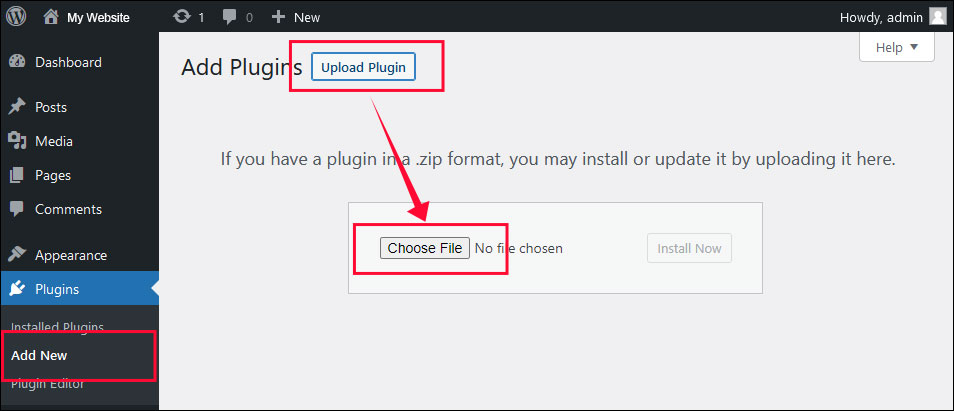
- Go to admin panel > Plugins > Add New > Upload Plugin
- Click on “Choose File” and select 3d-mapper.zip
- Click on “Install Now”
- Click on “Activate”
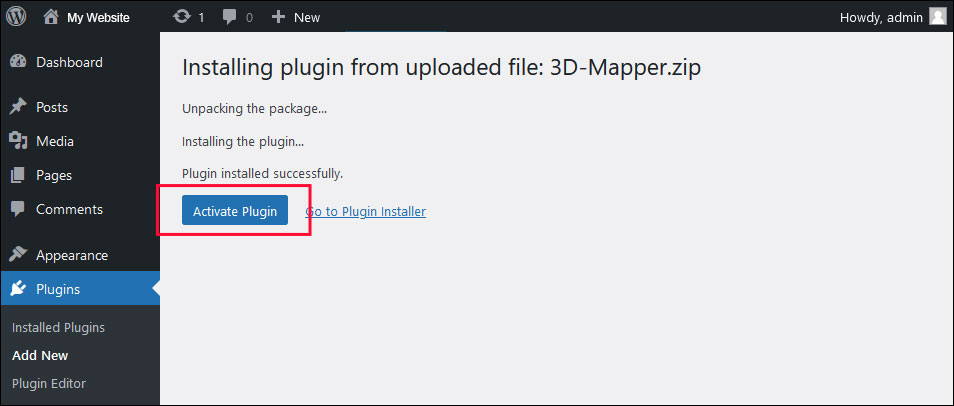
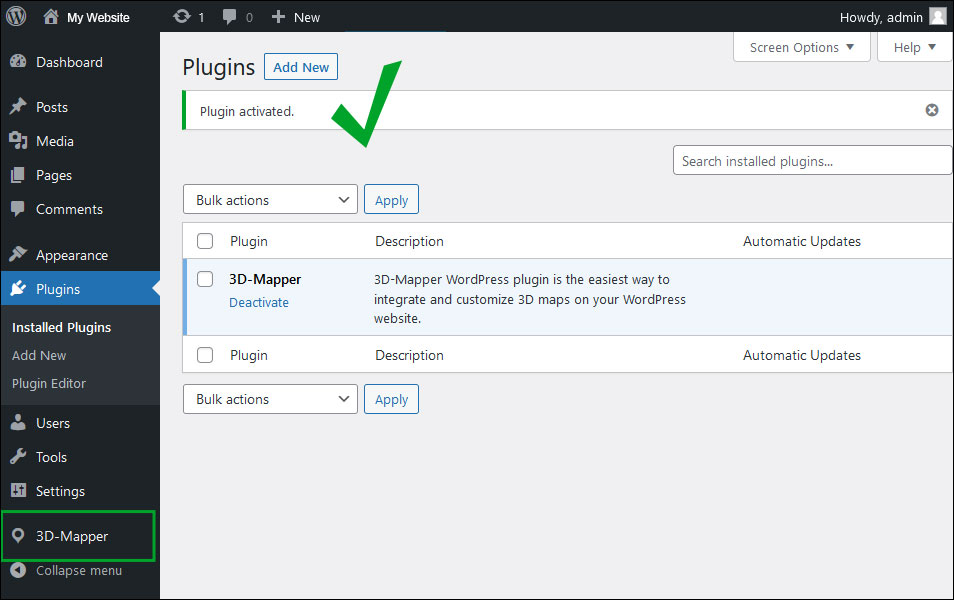
You have successfully installed the plugin.
To import your 3D maps into the WordPress plugin, you need to connect your 3D-Mapper.com account with the plugin using an access token first.
SEE HOW >
FTP upload
If you wish to install via FTP, here are the steps you need to take:
- Using FTP client, login to the server where your WordPress website is hosted
- Using FTP client, navigate to the wp-content/plugins/directory under your WordPress website’s root directory
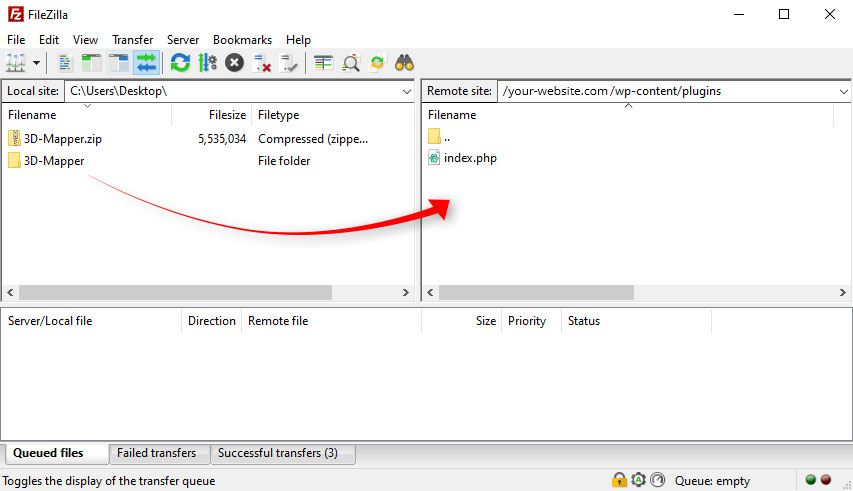
- Using FTP client, upload the 3D-Mapper directory to plugin directory on remote server
Once installation is complete, your 3D-Mapper will be ready to use by clicking the Activate button.
2. Get Access Token
To import your 3D maps into the WordPress plugin, you need to connect your 3D-Mapper.com account with the plugin using an access token first:
- Go to 3d-mapper.com and create a user account or log in if you already have an account.
- Browse to Dashboard > Your Profile
- Copy your Access Token
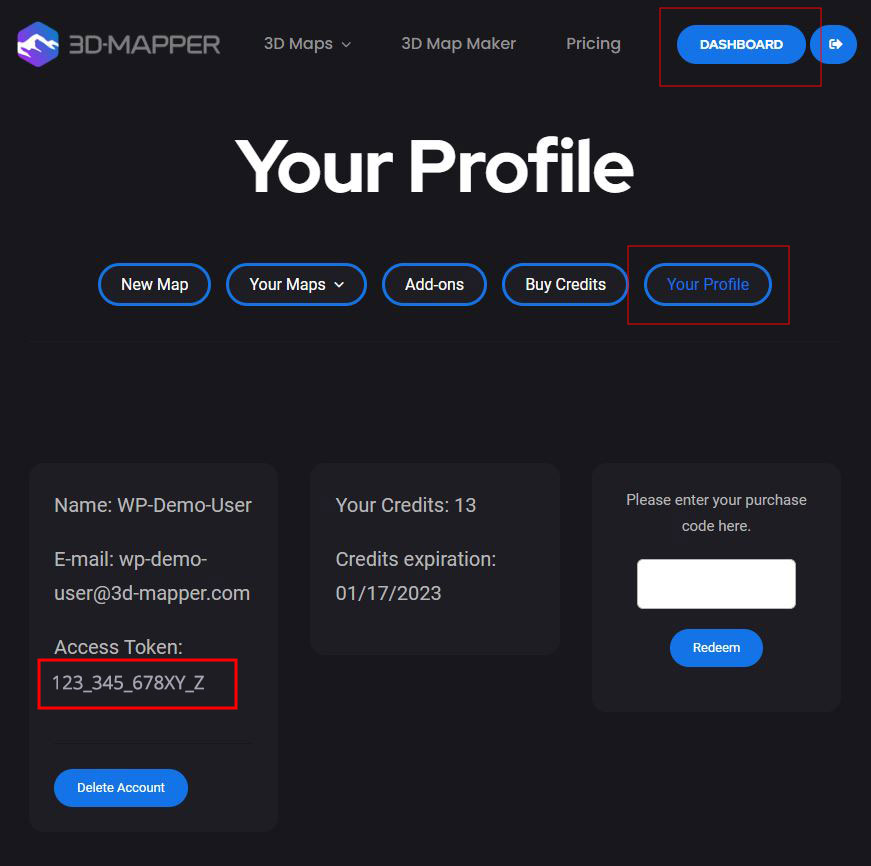
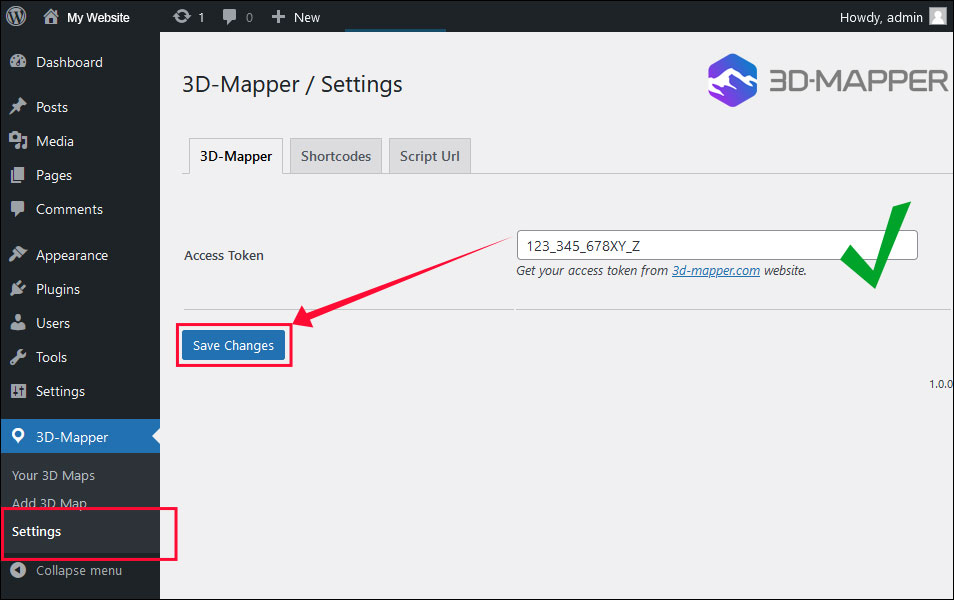
4. Go back to your WordPress > 3D-Mapper > Settings. Paste the Access Token and click “Save Changes”
Now your Plugin is linked with your 3D-Mapper account and you can import your 3D maps with just one click.
3. Import your 3D maps
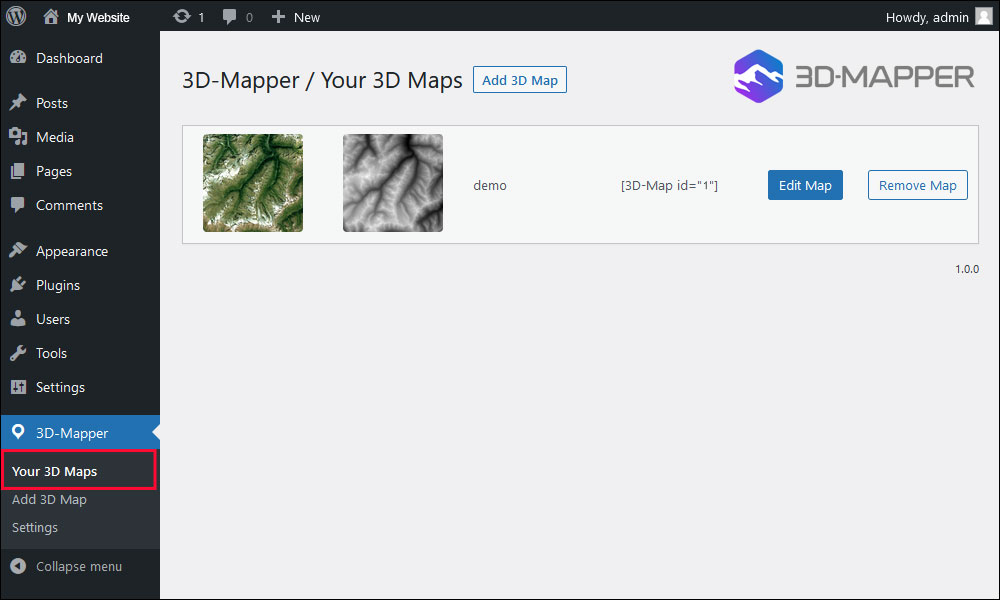
To add the final 3D map on one or more pages, simply copy the map’s shortcode and paste it into a text field of the desired page.
Your Content Goes Here
Now you can edit the 3D map functions and determine how you want the map to appear on your website.
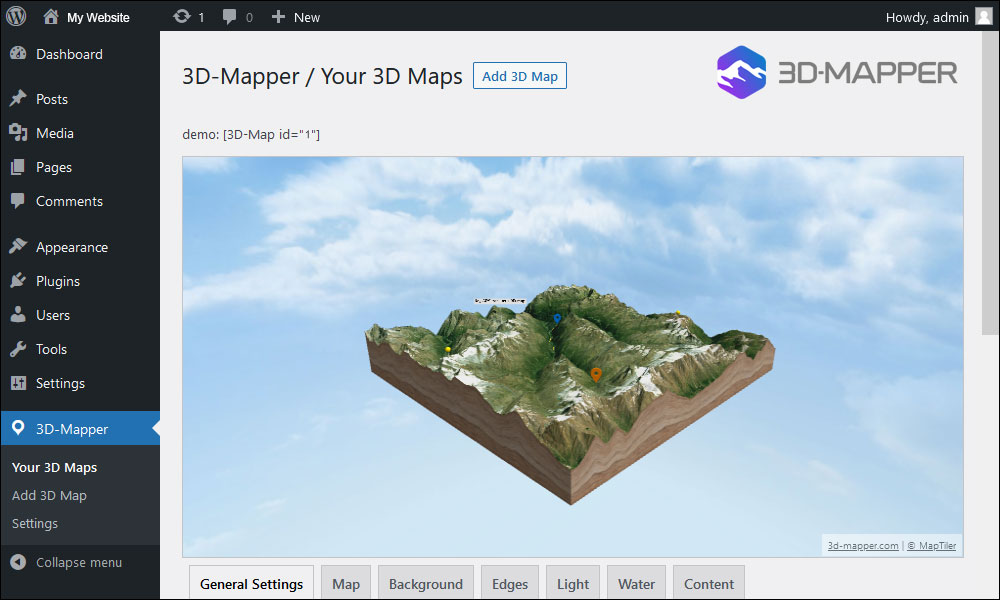
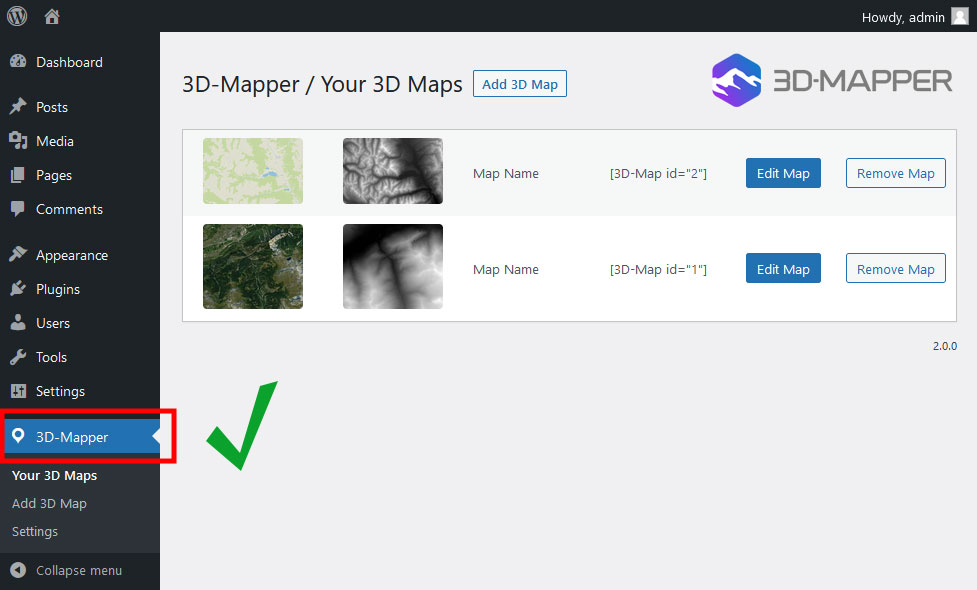
You can now find the map in the plugin list and edit it at any time.
4. Insert the 3D map on your website
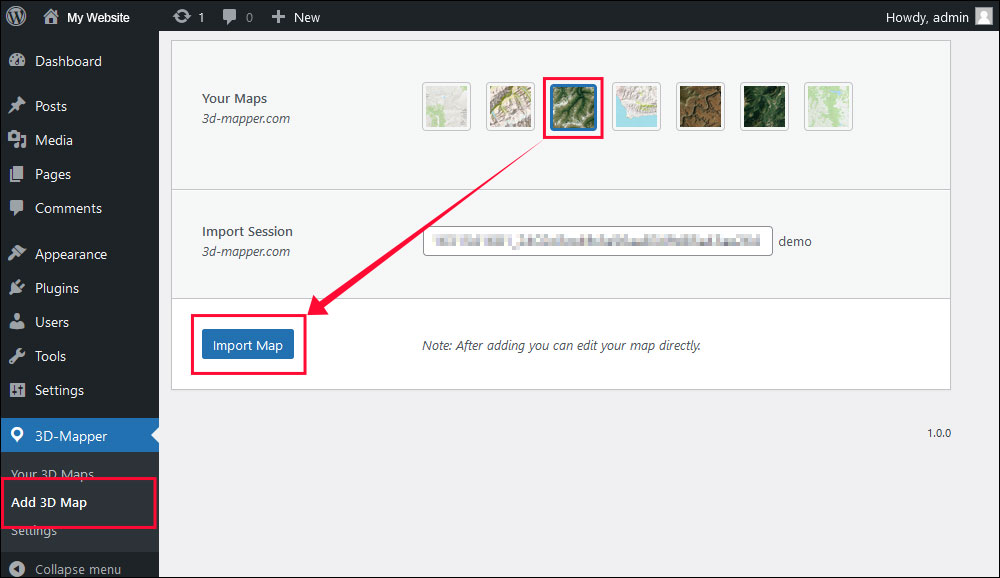
To import your 3D map into your WordPress, go to WordPress > 3D-Mapper > Add 3D Map. Select the Map you want to import and click “Import Map”
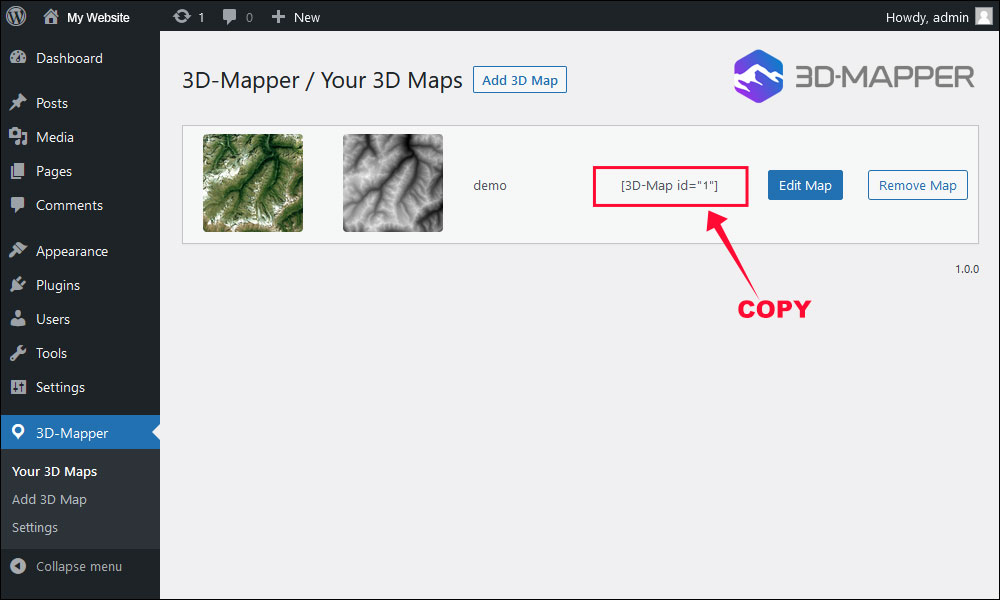
Past the 3D-Map id into any text block
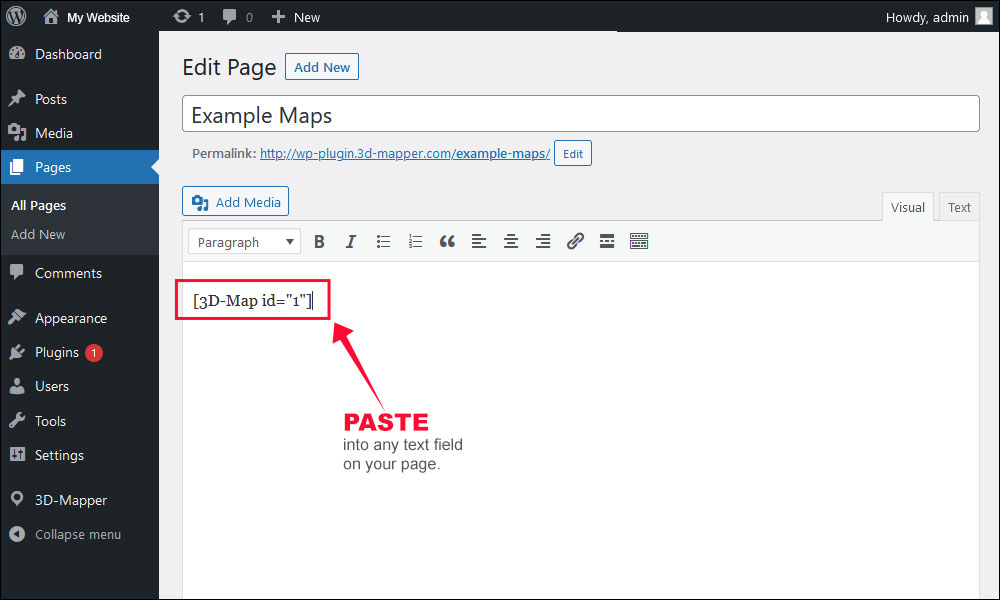
Now your 3D map will be embedded on your website
Update the plugin manually
To update your WordPress 3D Mapper v1.0 plugin without deleting previously imported 3D maps, you’ll need to perform a manual update. Here’s how:
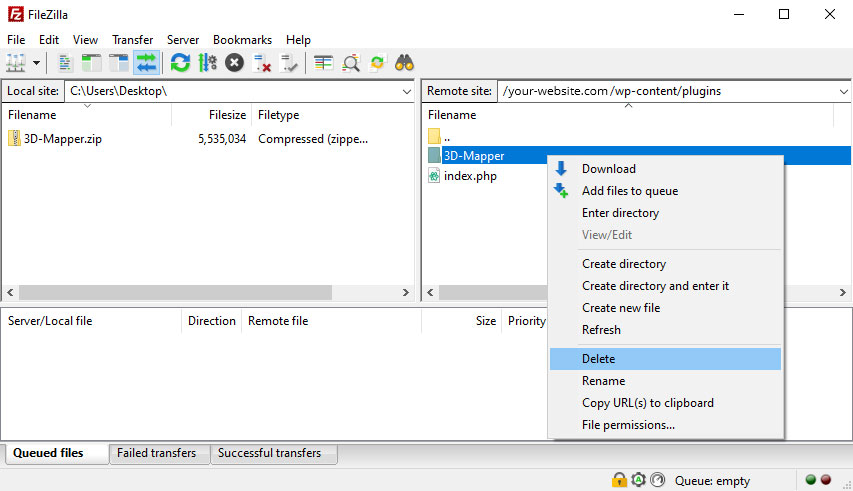
1. Open an FTP client (e.g., Filezilla) and connect to your WordPress website.
2. Browse to /your-Website.com/wp-content/plugins.
3. Delete the “3D-Mapper” folder.
4. Download the new 3D-Mapper.zip and unzip it on your desktop.
5. Copy the entire “3D-Mapper” folder to the directory /your-Website.com/wp-content/plugins on your server.
6. Log in to your WordPress admin panel and open the 3D Mapper in the menu. If your old maps are listed, the update is complete.
Tip: Since many new features have been added in the update, make sure to check that your old 3D maps are displayed correctly and that the map’s lighting settings are in order.
